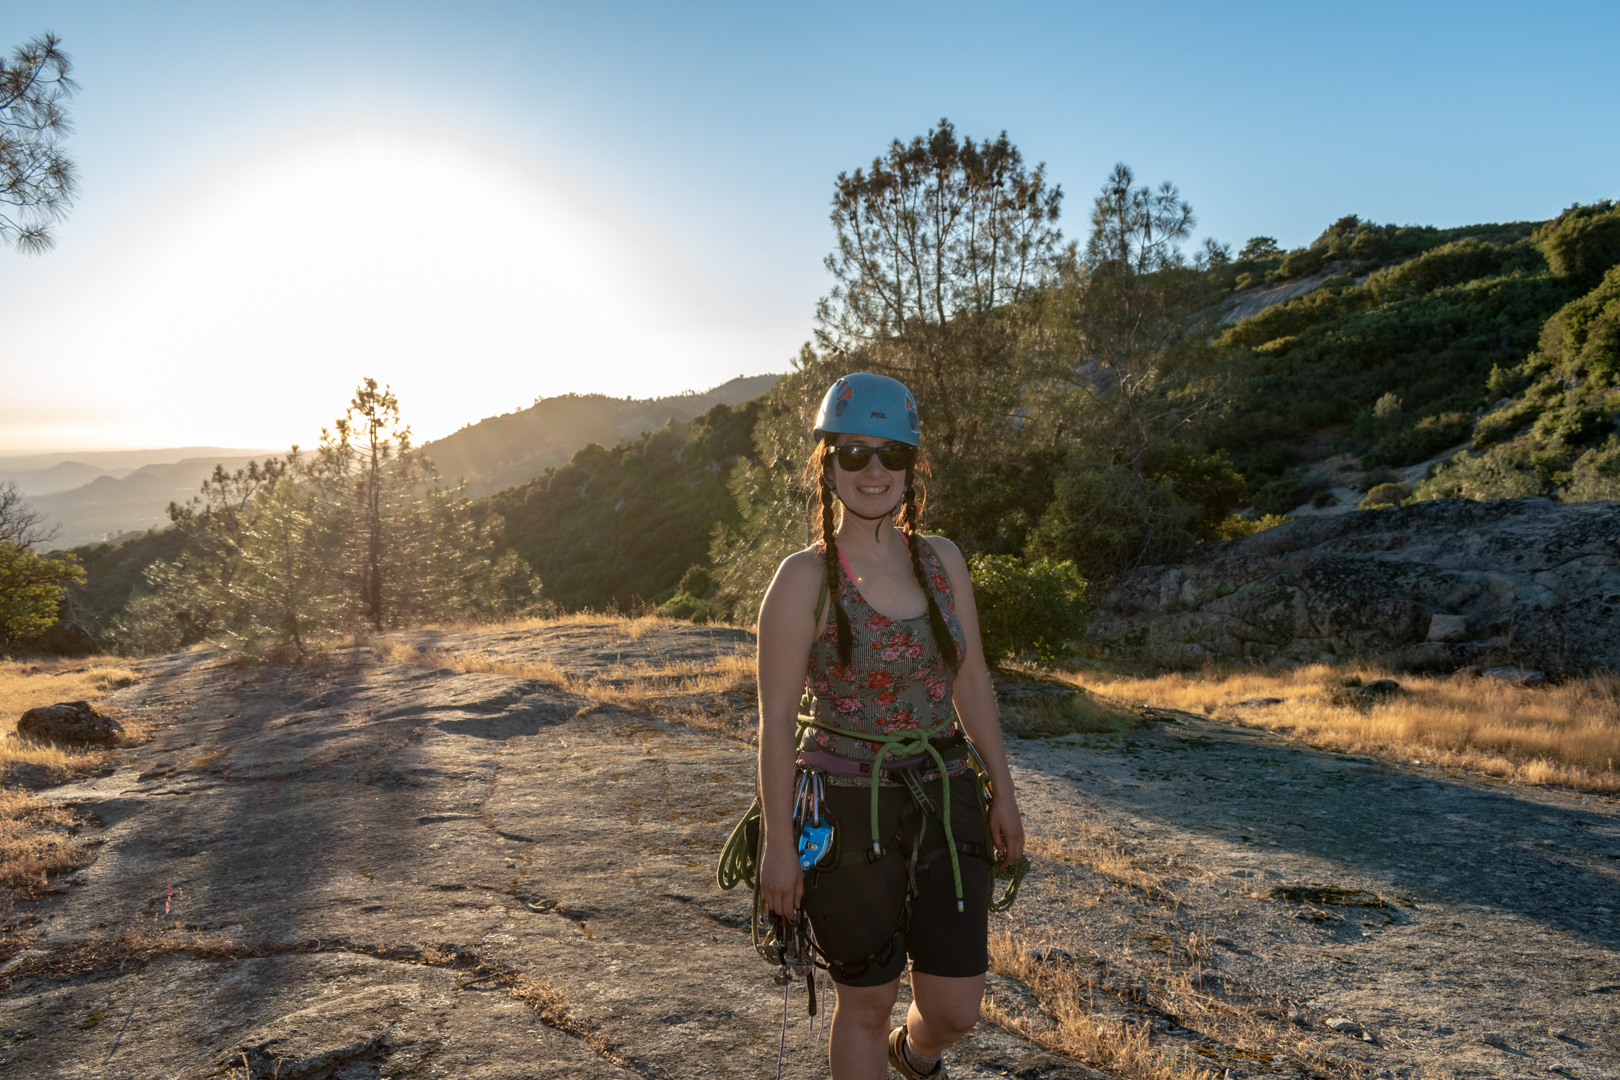
Tollhouse Rock is a 600′ granite dome located about an hour northeast of Fresno, California. It hosts several multi and single pitch climbs including Tollhouse Traverse, 5.5 YDS, 4 Pitches. I climbed this with my wife Alexa on June 16th 2020.
Stats:
Difficulty: 5.5 YDS
Number of Pitches: 4
Route Length: 600 feet
Approach Time: 20-30 Minutes
Location: Near Fresno, California
Summit Elevation: 3,551 Feet
Useful Links:
Driving Directions (Google Maps)
Weather Forecast (Weather.gov)
More Info (Mountain Project)
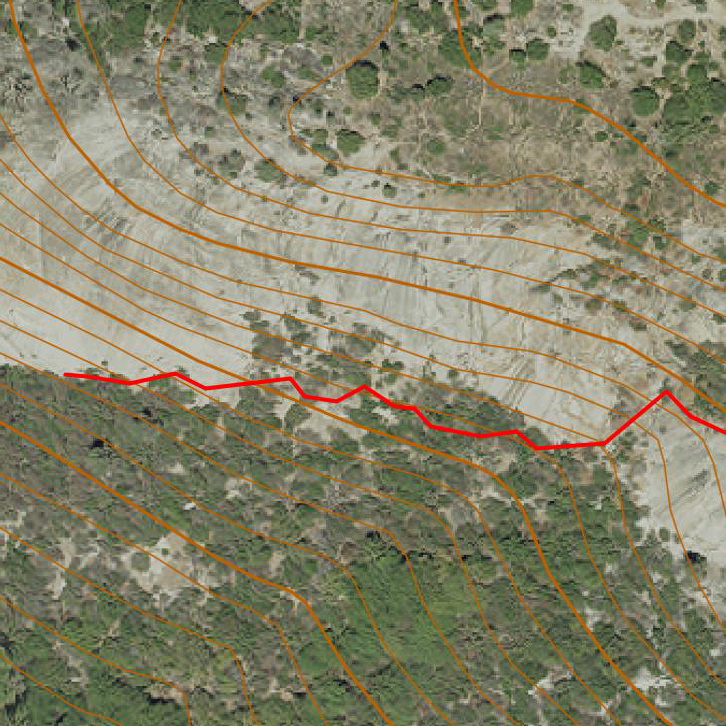
View Trail Map On CalTopo.com
Download Trail Map PDF
Alexa and I tried to climb this route twice before we finally succeeded. The first time there was one party in front with a rope solo climber behind them. Both were going very slowly. The second time there was a family of 5 (including young kids) starting the route. We walked to another climb, climbed and cleaned the first pitch, and then walked back and they still hadn’t finished the first pitch.
With the hope of finally having the route to ourselves, Alexa and I left Fresno at 3:30pm on a moderately hot day. We made our way from Fresno to Highway 168. After a 3-way stop junction (with a convenient park & ride) Highway 168 climbed steadily and became a 4 lane highway. We ascended for 8.8 miles until we could turn right onto the well-signed Tollhouse Road. We followed Tollhouse Road for approximately 2 miles until a left turn on to an unmarked dirt road called Burrough Mountain Road.
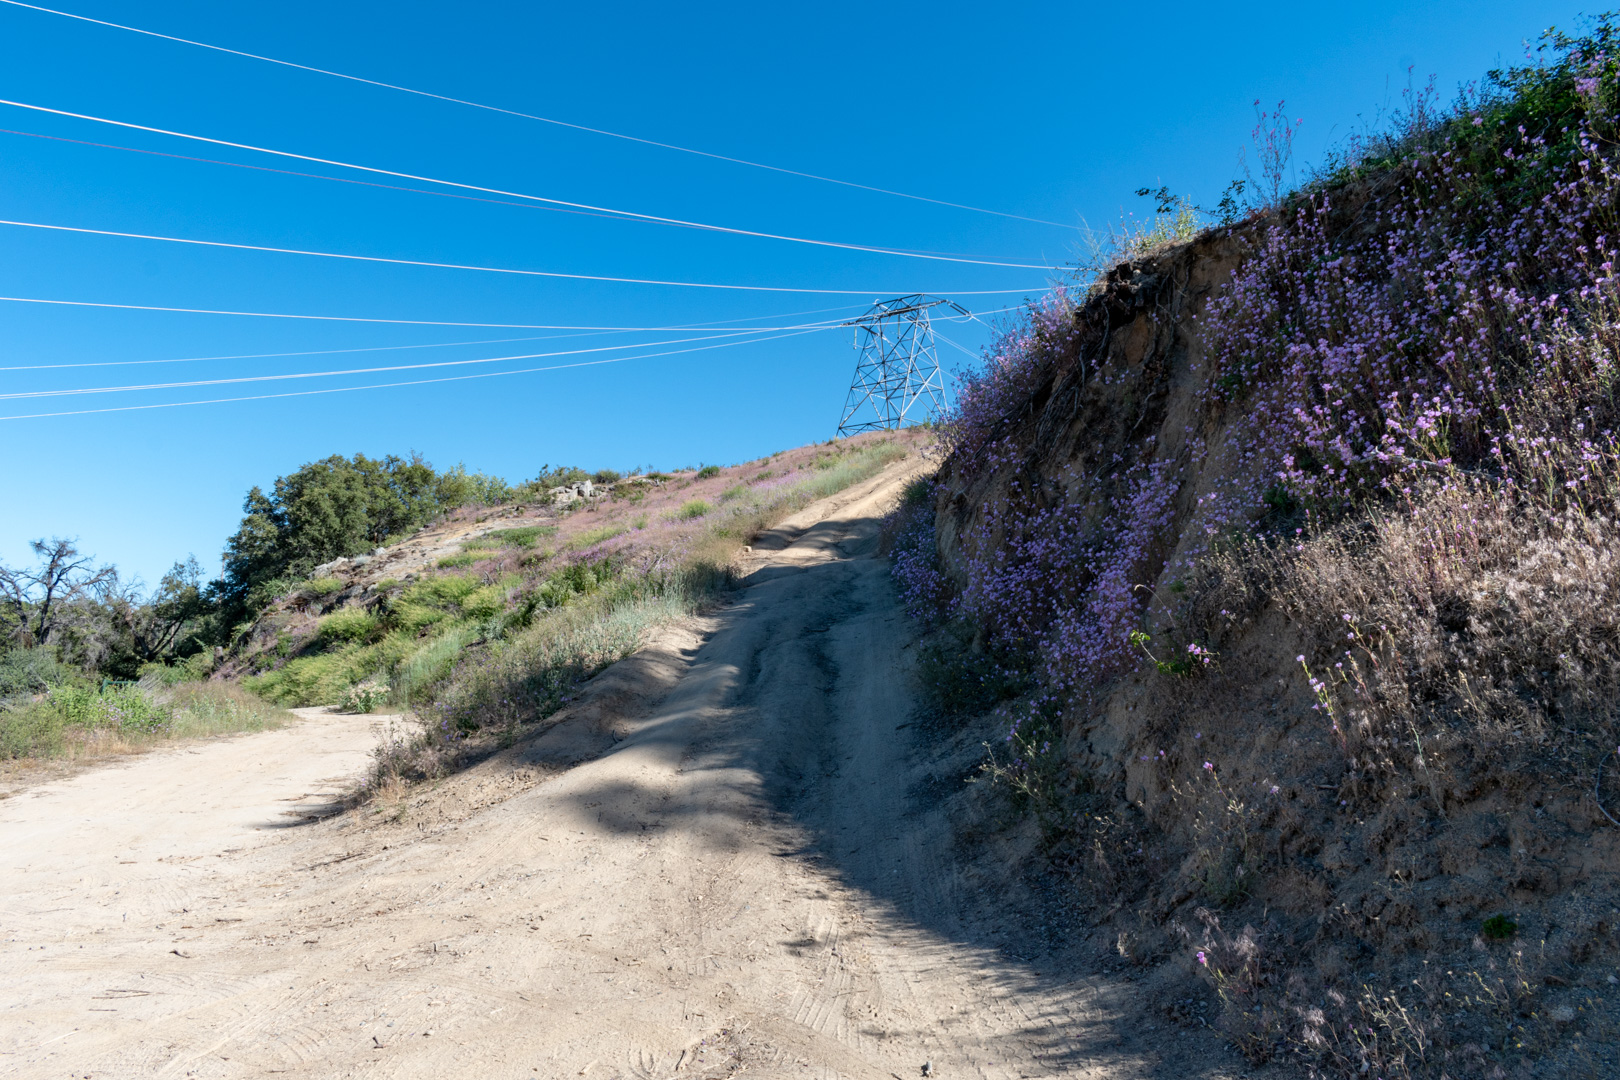
Burrough Mountain Road is doable in a car/suv with decent ground clearance. 4WD might be required in spring/winter when the road may get muddy in spots. Our 2015 Subaru Outback didn’t have any trouble, but the road is intimidating in at least one spot. Many people end up parking in pullouts and hiking along the road because of this. The ultimate goal for most people without serious off-road vehicles is to reach the power lines that cross over the road approximately 0.8 miles from Tollhouse road.
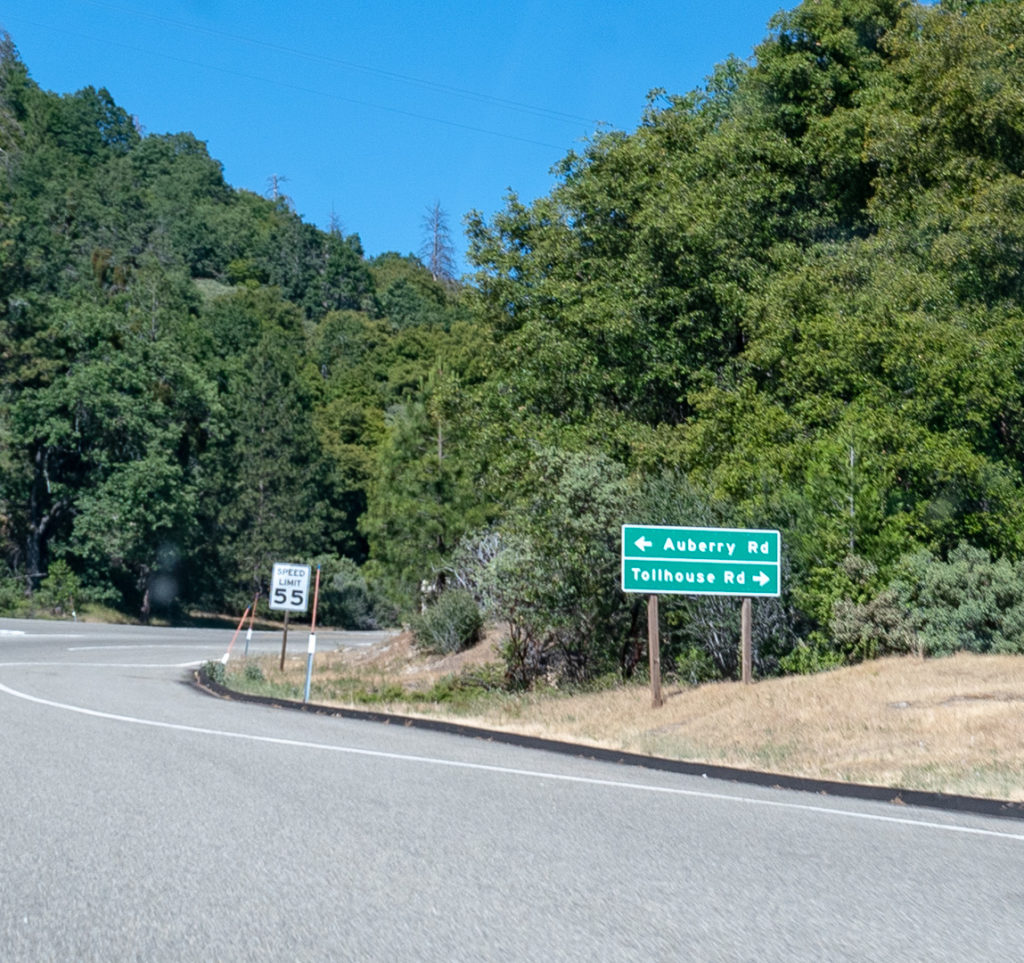
Turn off Highway 168 onto Tollhouse Road 
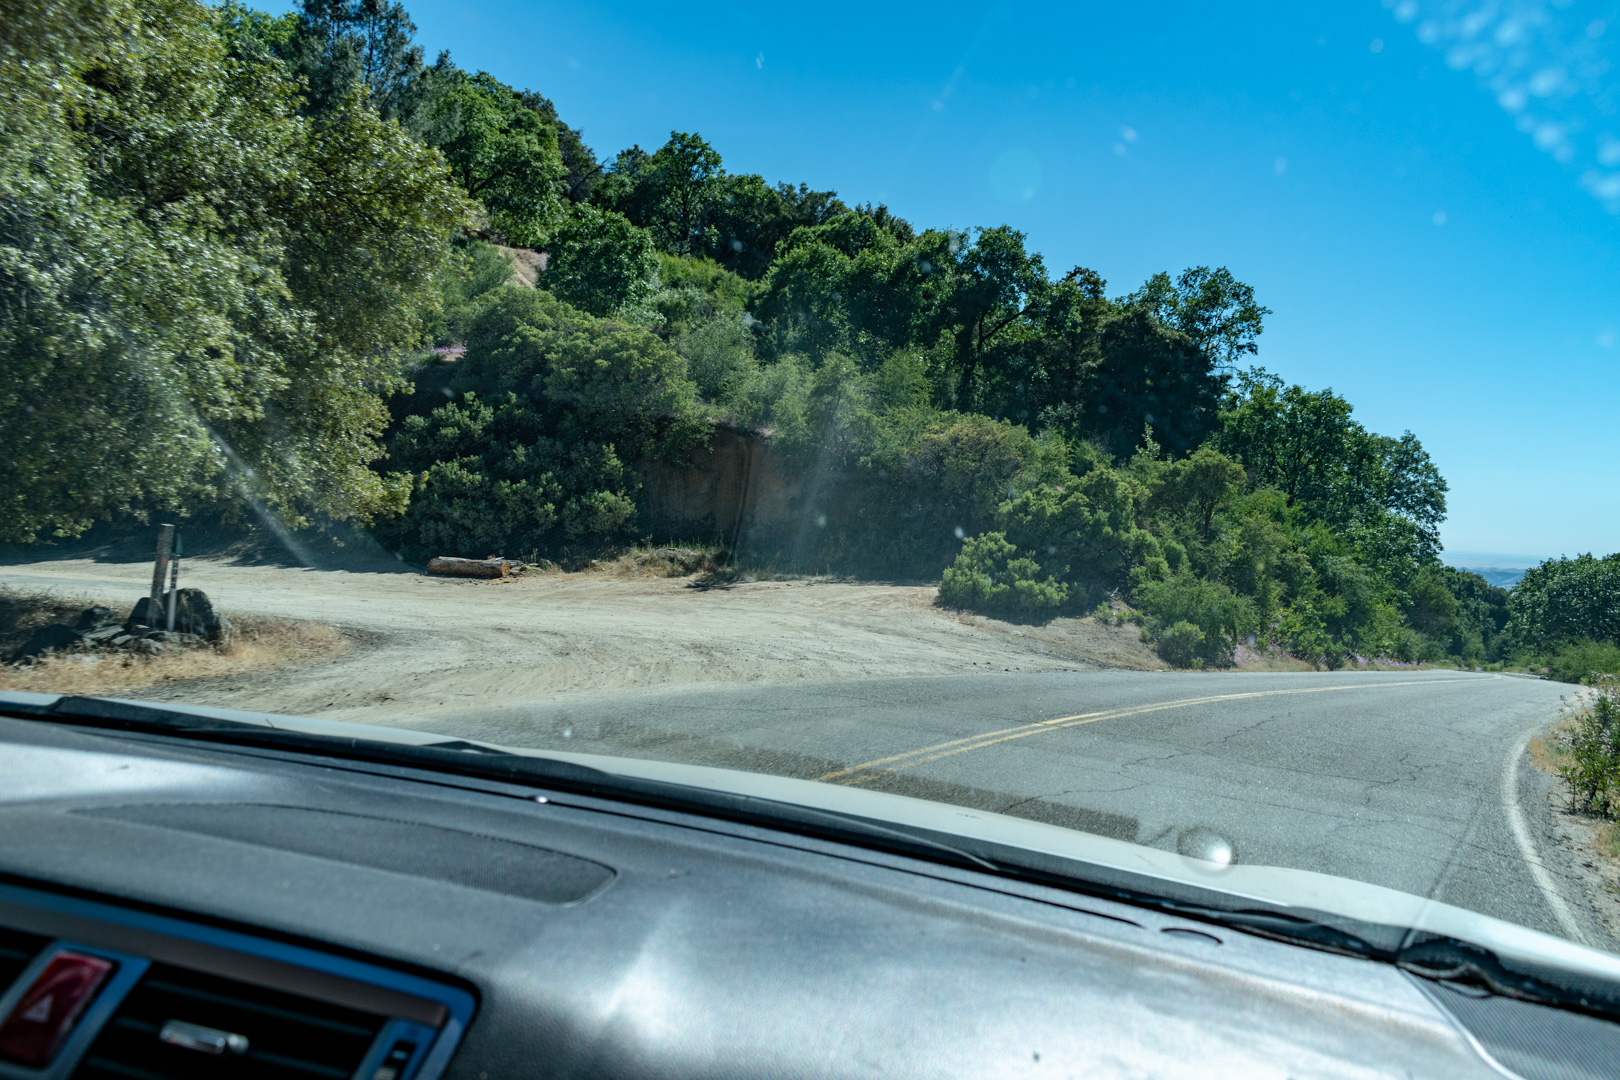
Turn off Tollhouse Road onto unmarked Burrough Mountain Road 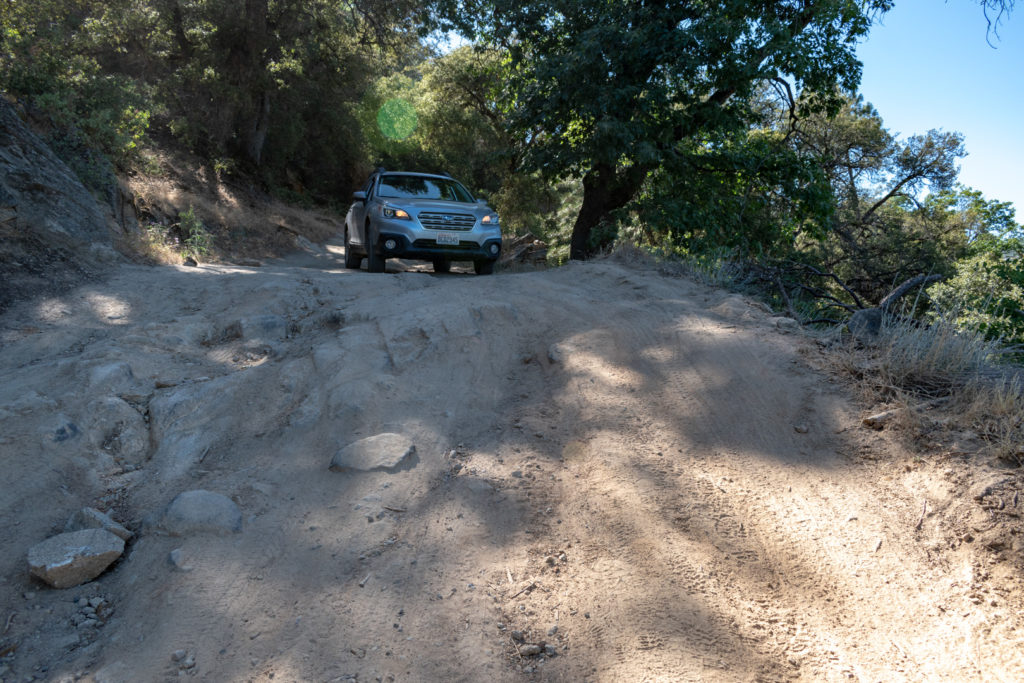
Worse than it looks, Burrough Mountain Road 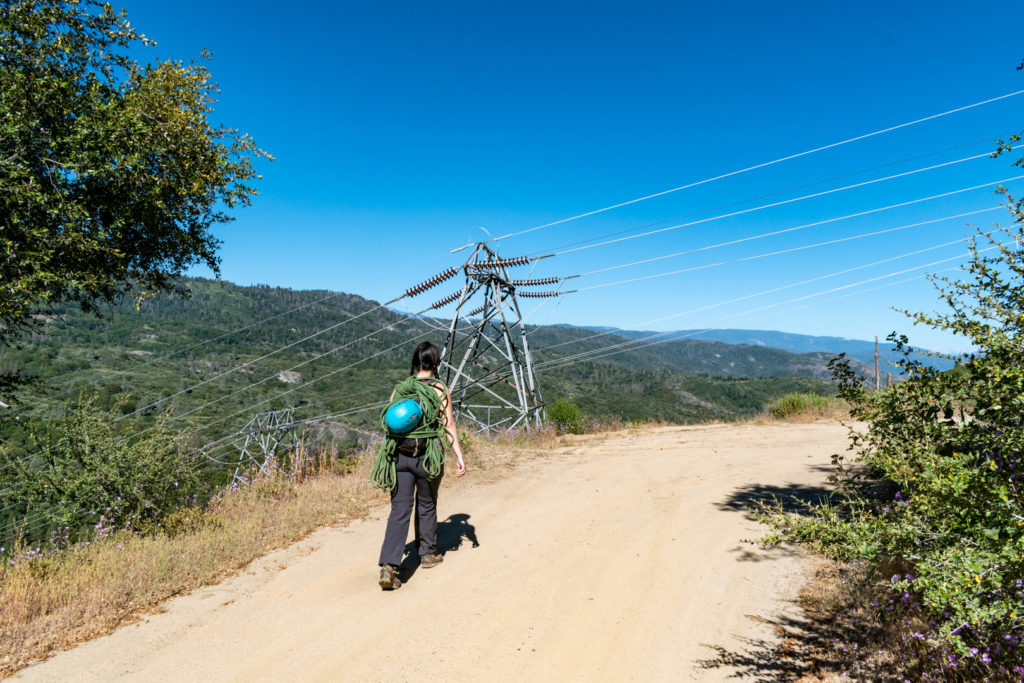
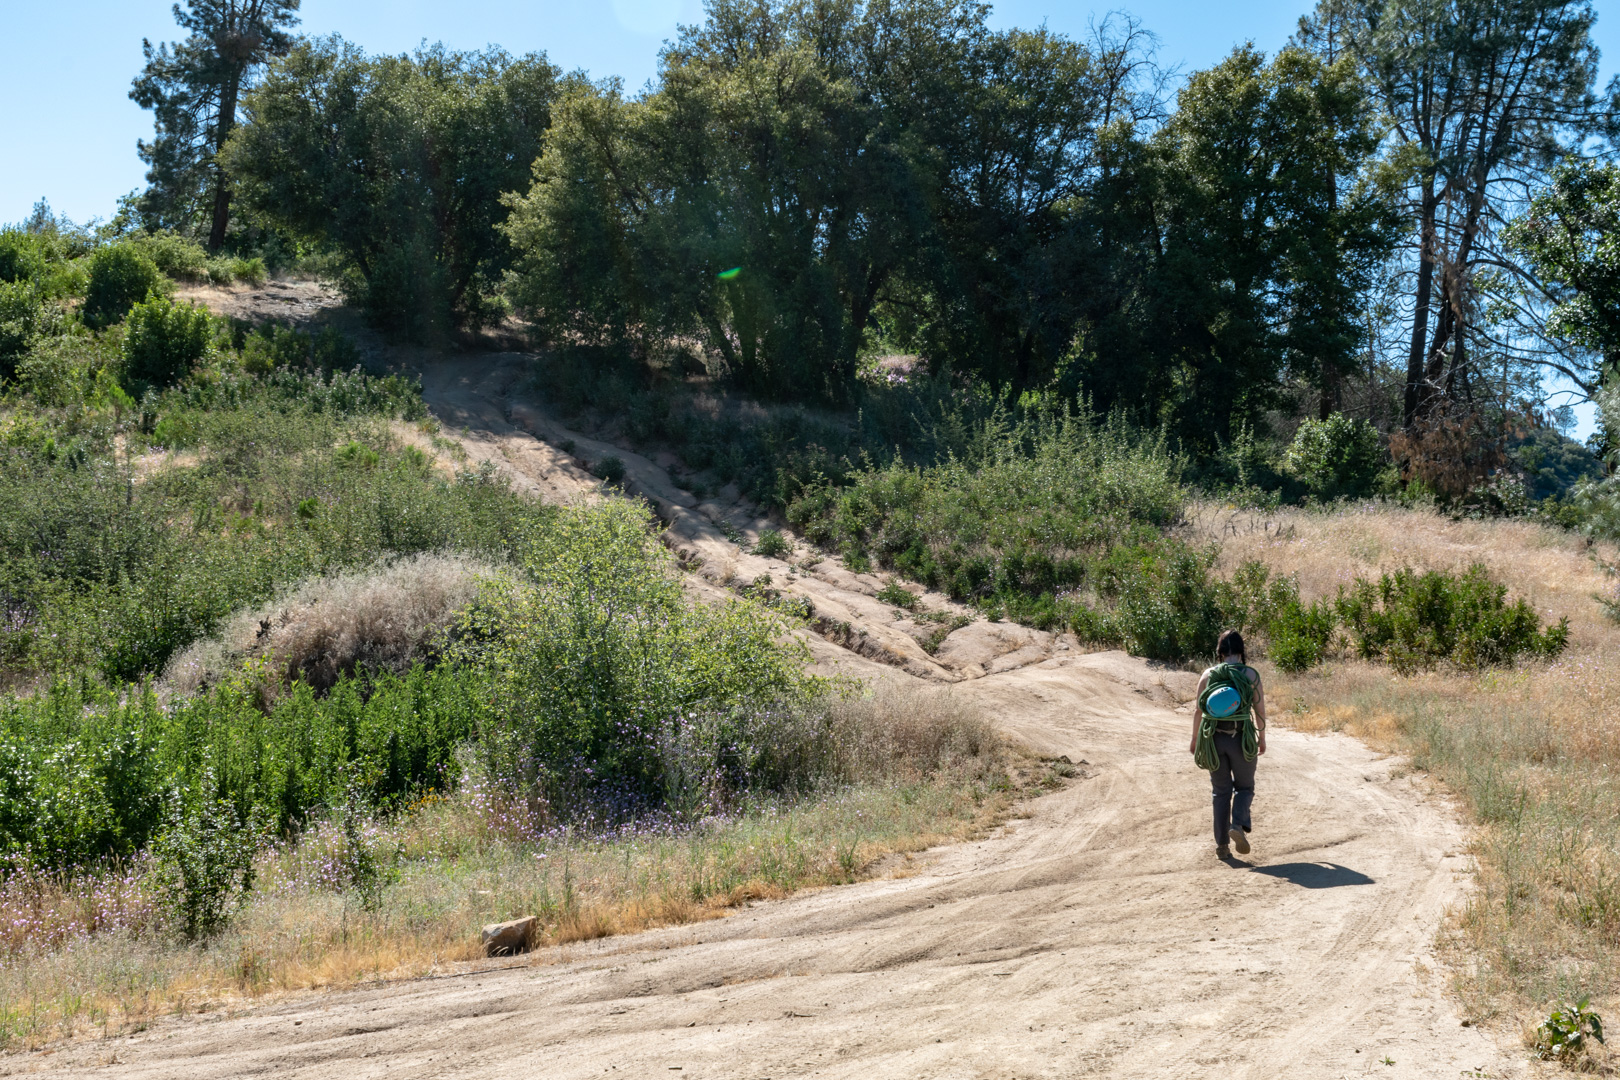
Hiking towards the power lines on the approach to Tollhouse Rock


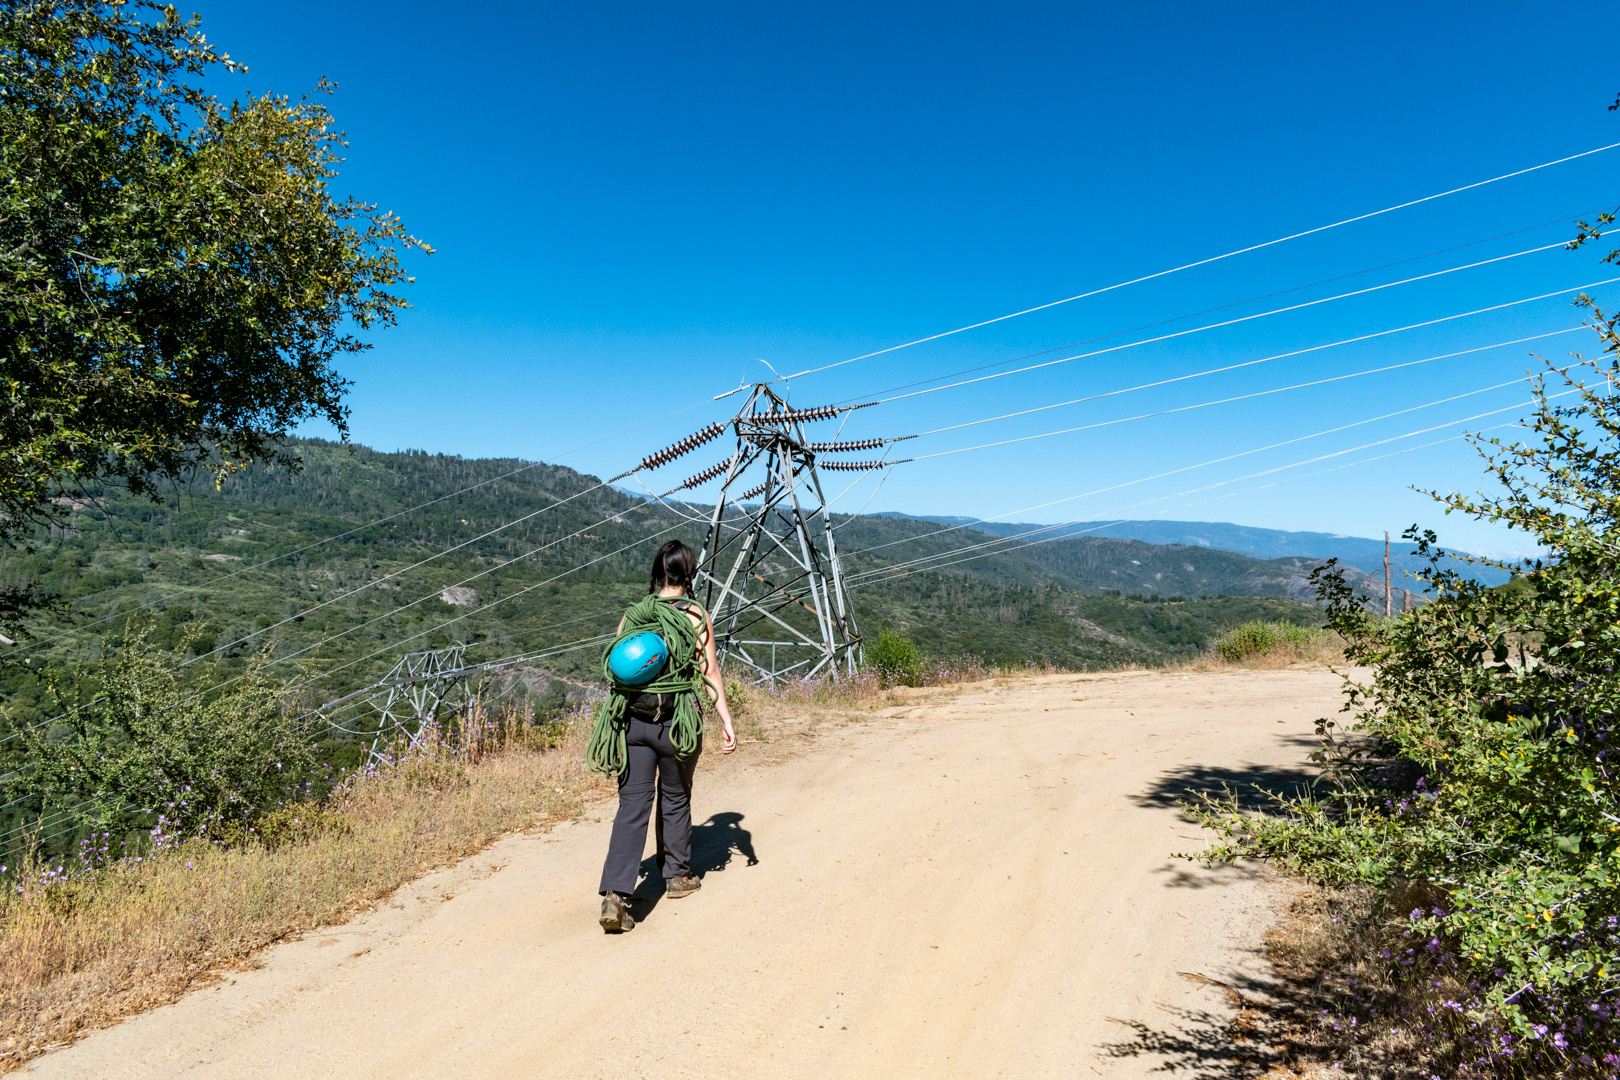
Once we reached the power lines, we turned up the steep dirt road that parallels them. I suspect that my Subaru could make it up this hill, but not sure enough considering the consequences of being wrong. Better off only trying this section if you have a serious off-road vehicle. At the top of the hill we turned right (west) and continued heading up hill on the obvious dirt road. Eventually we reached the top of the approach, a large open granite slab. This isn’t the top of the main wall of Tollhouse Rock, but it is the top of the formations to the right such as Sunday Slabs.

Head up this road following the power lines to the top 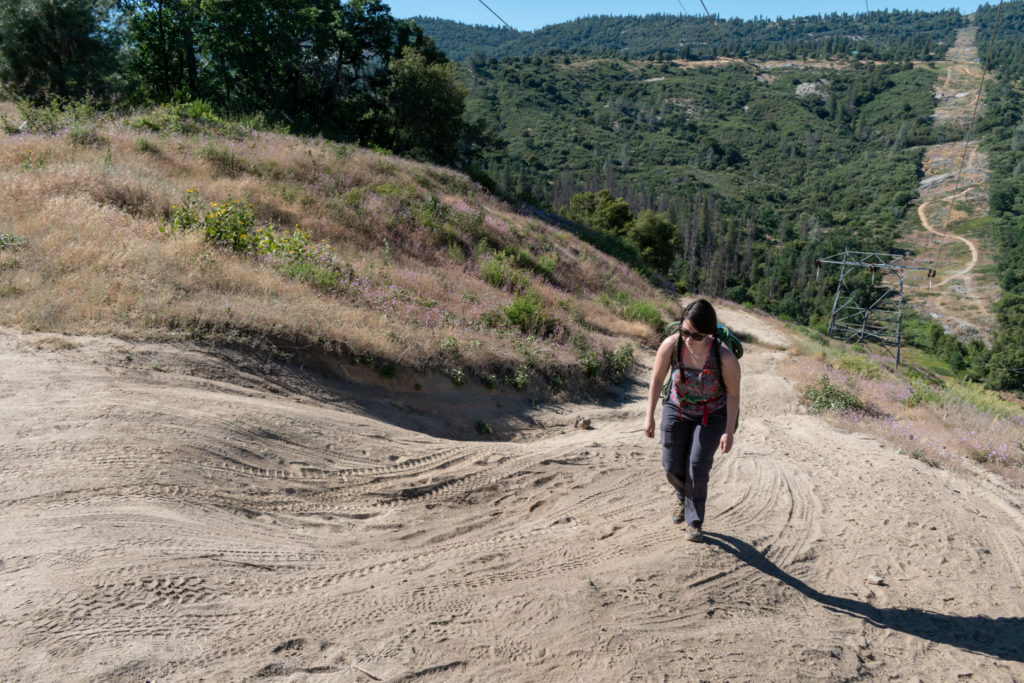
Alexa nearing the top of the power lines 
At the top of the power lines, turn right (west) 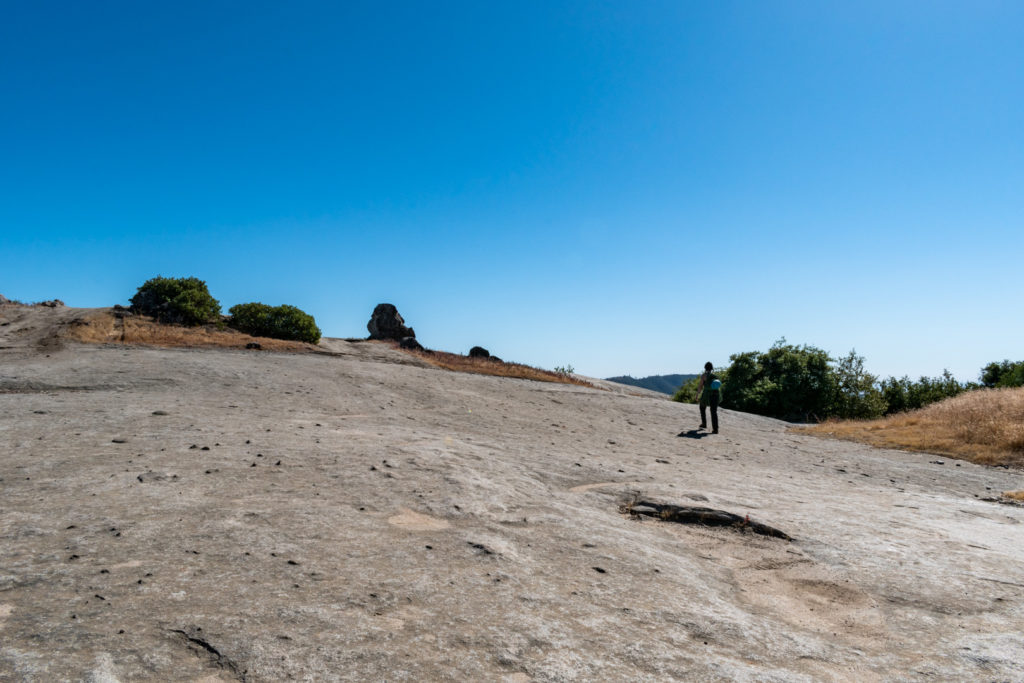
Granite slabs at the top of the approach to Tollhouse Rock


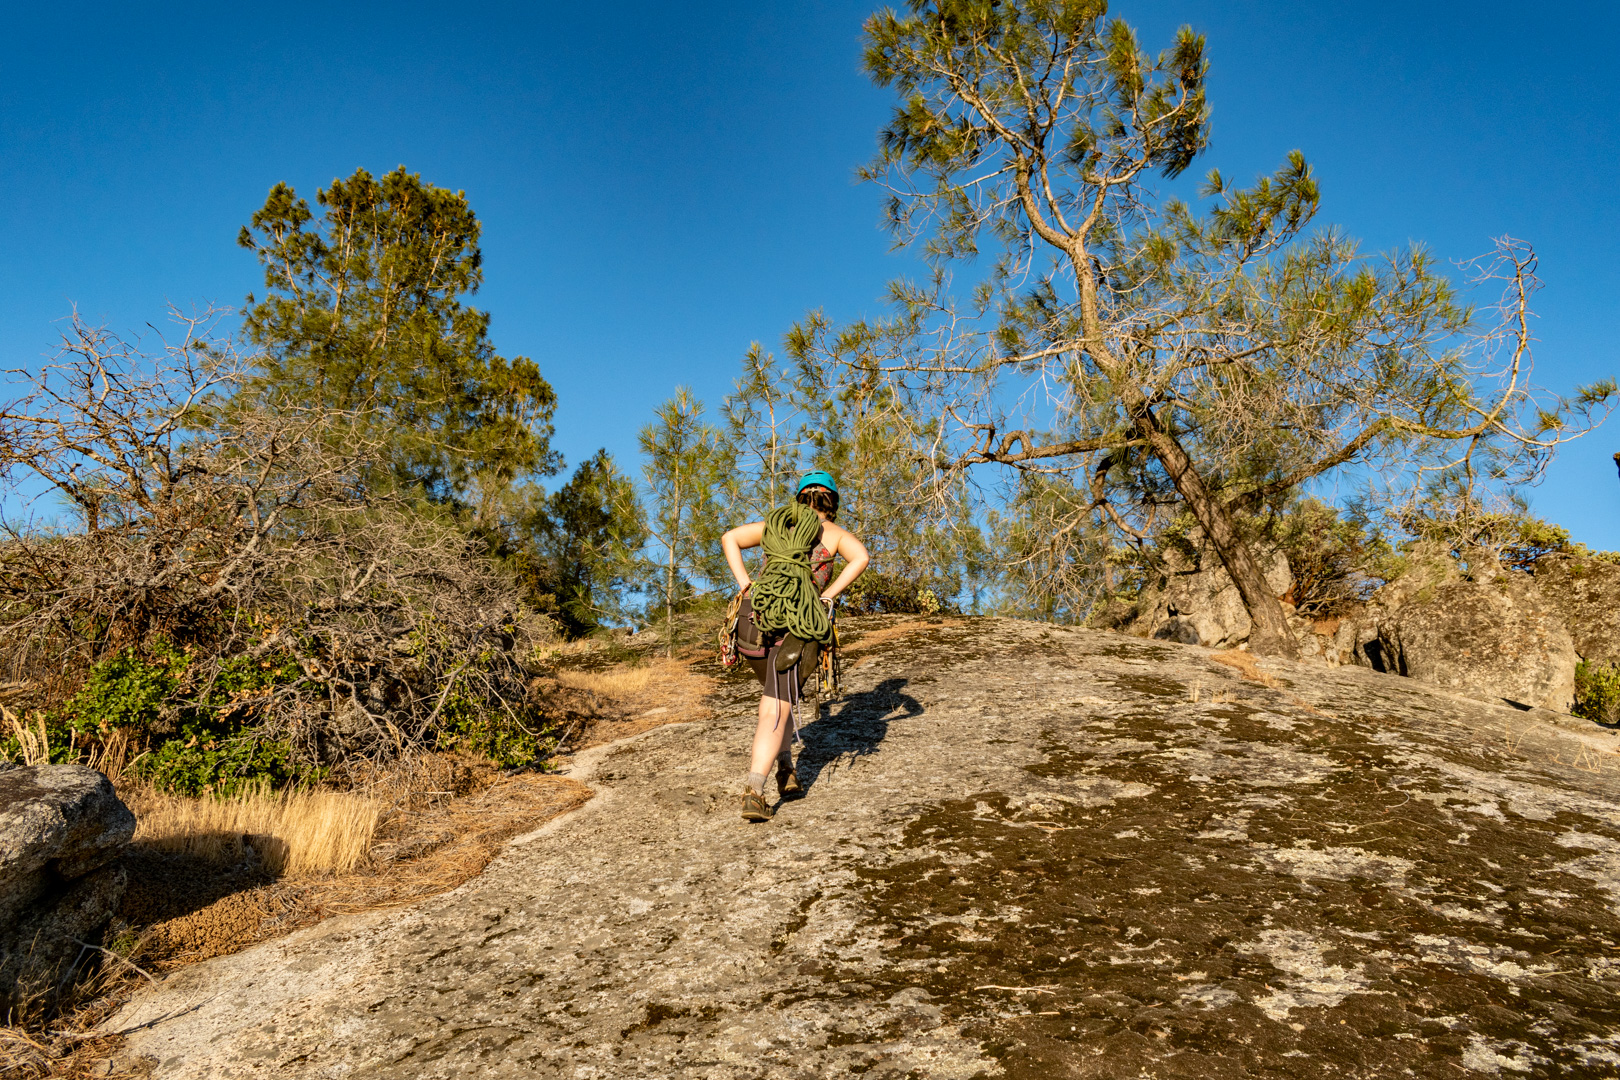
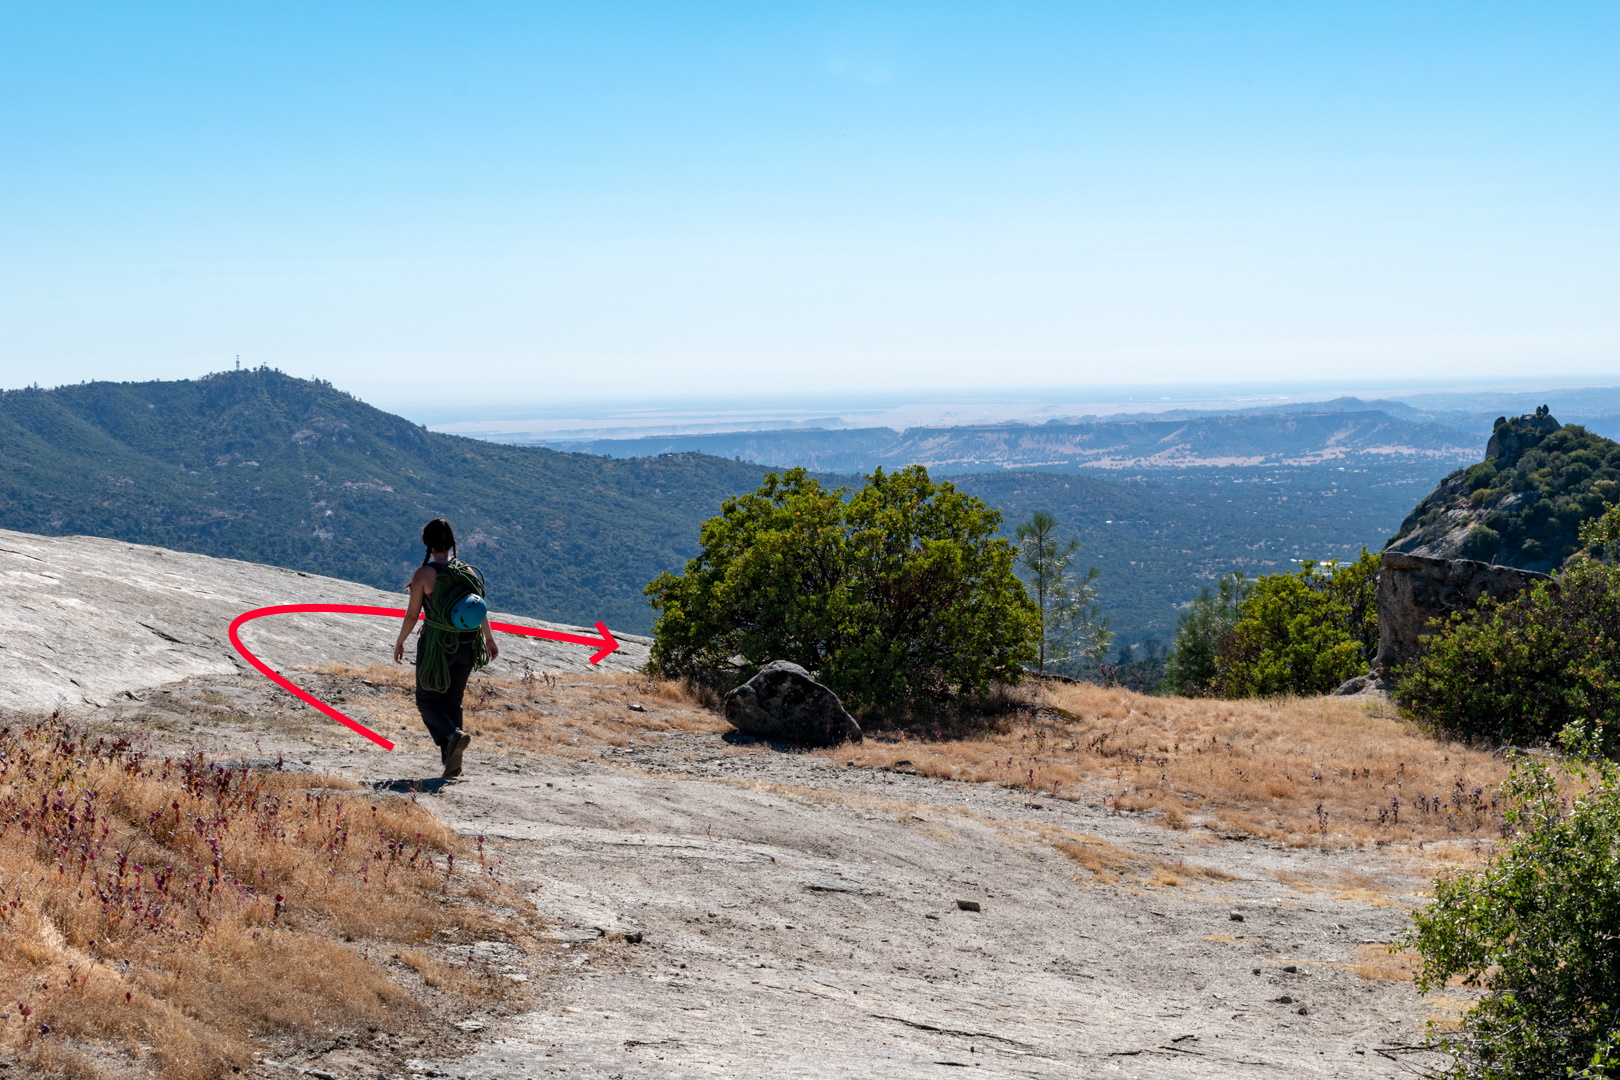
We hiked along the right side of the granite slab. Once near the edge, a slabby ramp heads down NW towards the bulk of Tollhouse Rock.

Heading down towards the approach slabs 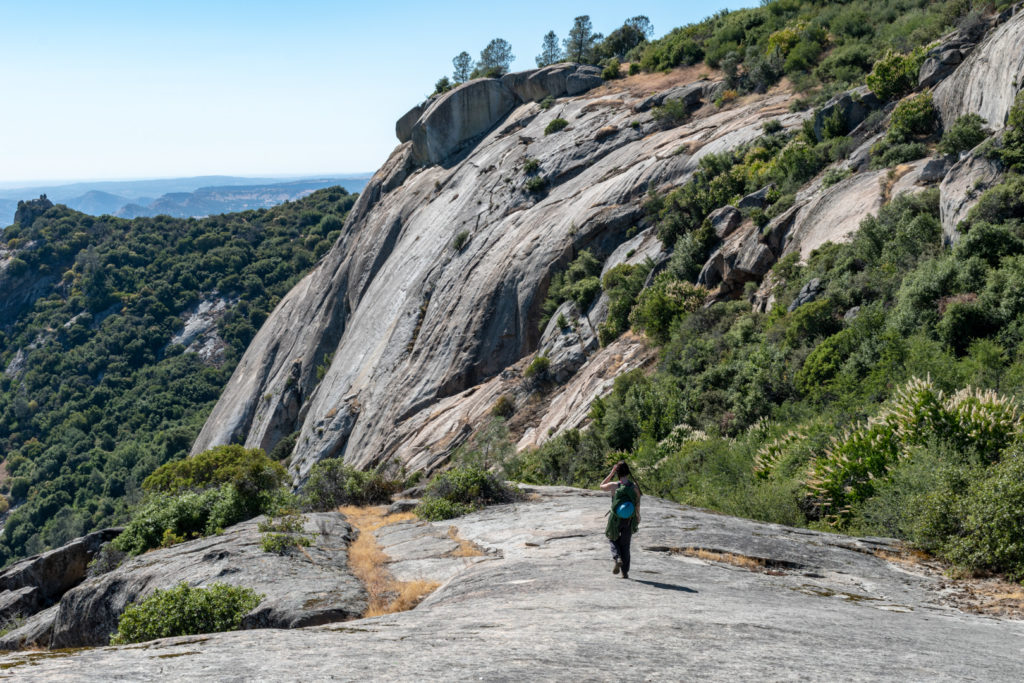
Following slabs down towards Tollhouse Rock

After a few minutes on the slabs we reached a large boulder. We went around the boulder on the left side and kept traversing. Straight down would be sketchy and possibly cliff out. After the boulder the trail is more-or-less easy to follow. There was one other spot where we considered going down slabs but traversing was correct.
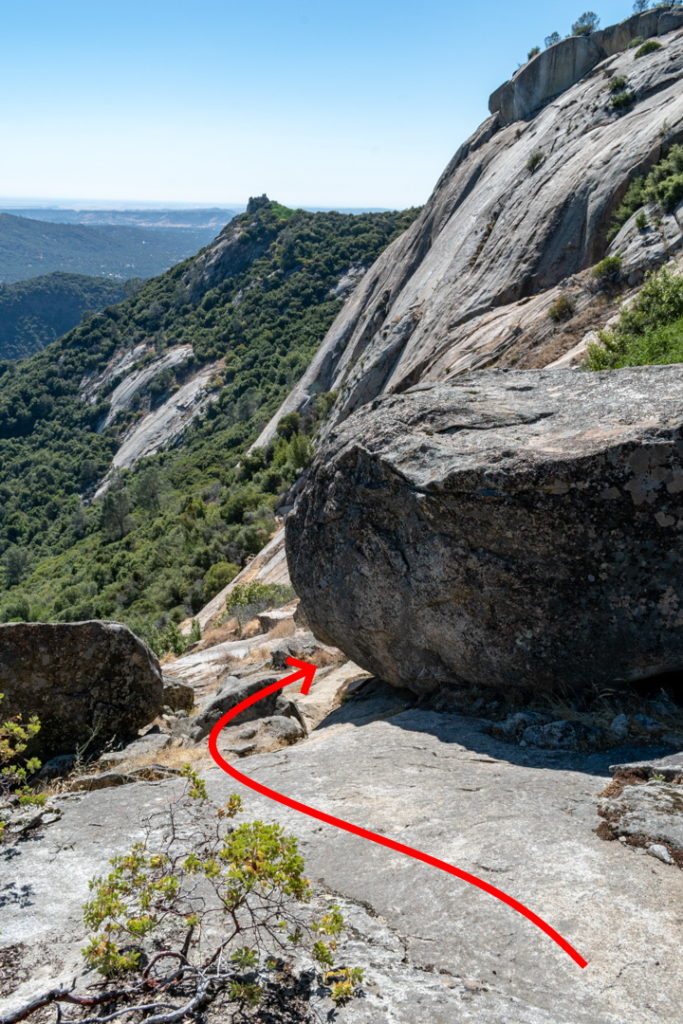
Went around this boulder and kept traversing. Not straight down! 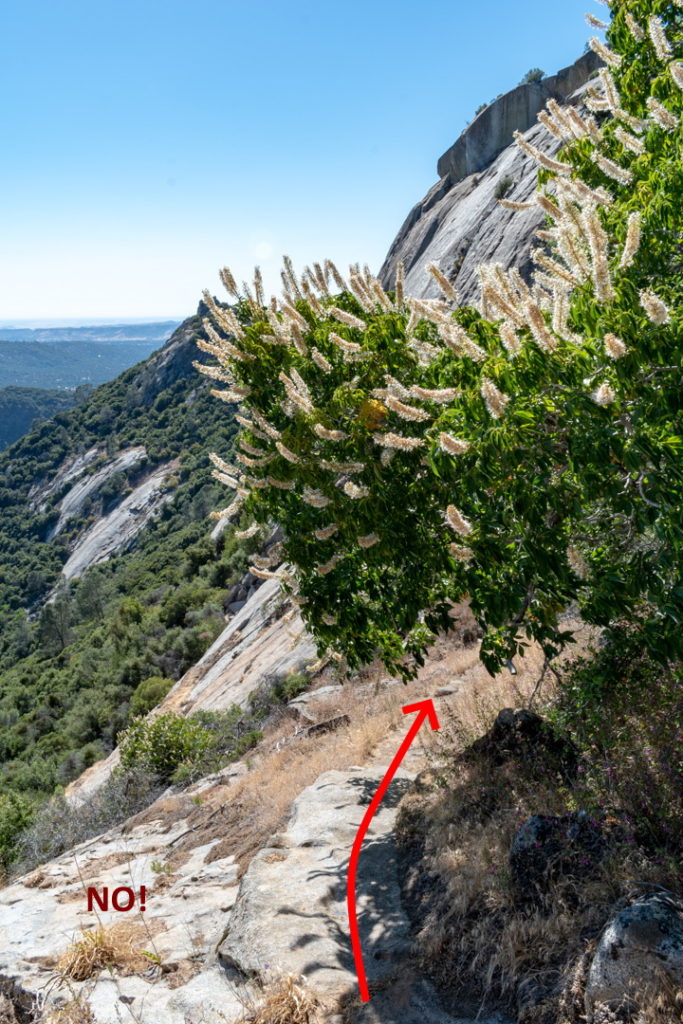
Another spot where the trail traverses and doesn’t go straight down!

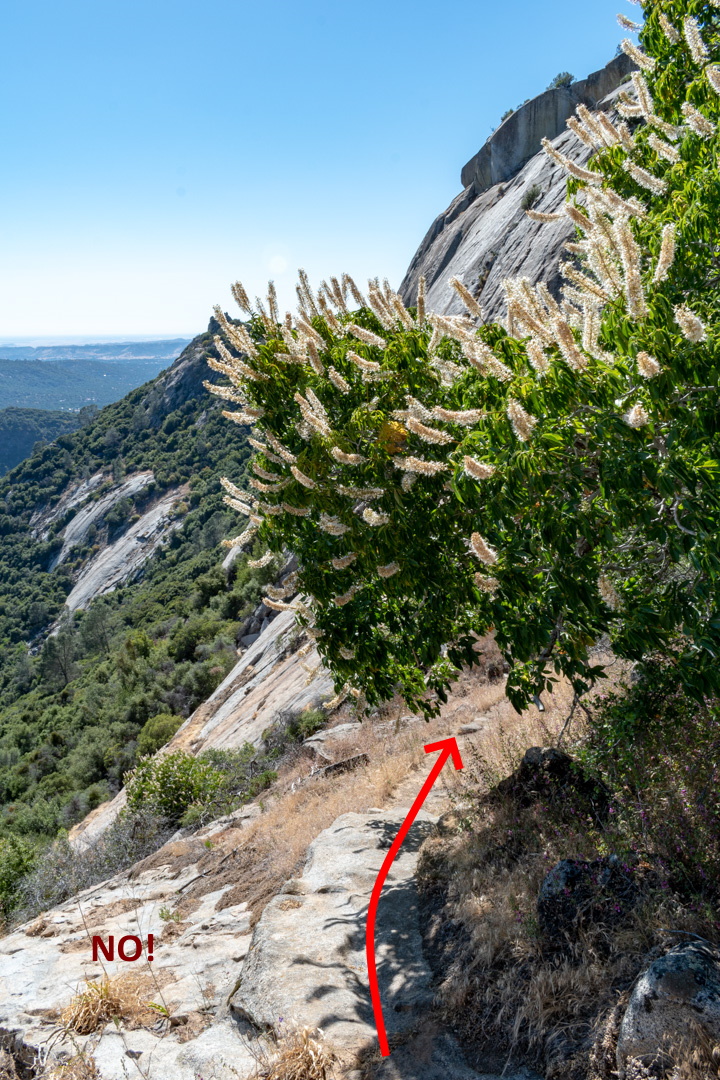
There were a few spots on the approach that felt a bit exposed. If you’ve never done a climbing approach or much scrambling in the mountains, these sections might be a bit scary. They are not difficult terrain, easy 3rd class at worst, but they still require care since consequences of slipping and falling could be bad.
We kept working our way down and right, down and right. The route starts near the low point of the whole formation, so we knew to keep going unless the bottom was feeling close. Eventually we reached the start of the Tollhouse Traverse route, an obvious cleft in the rock that splits part of the way up and continues. There was also an obvious flake sticking out of the crack part of the way up.
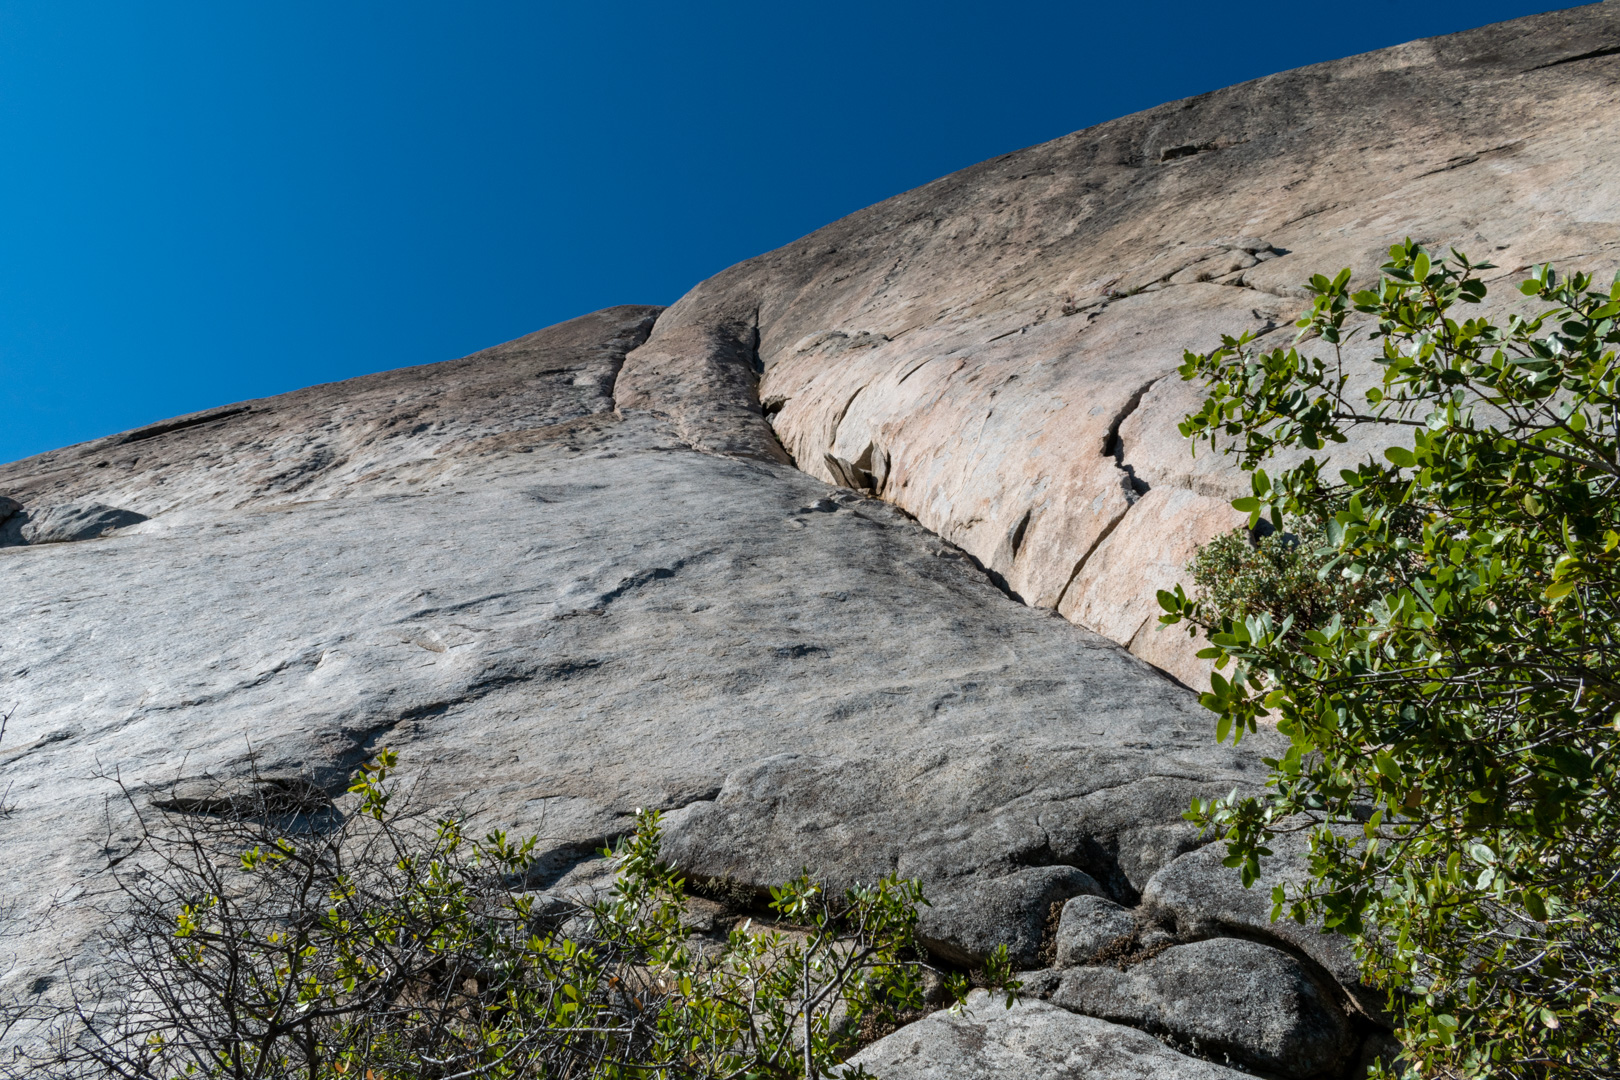
We racked up and started up the first pitch. The initial crack was wide for most of the way, so I saved my larger cams as much as possible, looking for any smaller placements that appeared in the crack or on the sides. I reached the flakes sticking out of the cracks and traversed over to the left crack.
The very bottom the the left crack is shallow and tricky to protect, but it opens up for good gear after the first few feet. The second crack was more fun than the first, and it even had 2 or 3 bolts to clip on the way. They were totally unnecessary with good trad placements nearby, but who doesn’t love clipping surprise bolts? I found the bolted belay slightly left of the main crack with a decent ledge to stand on.
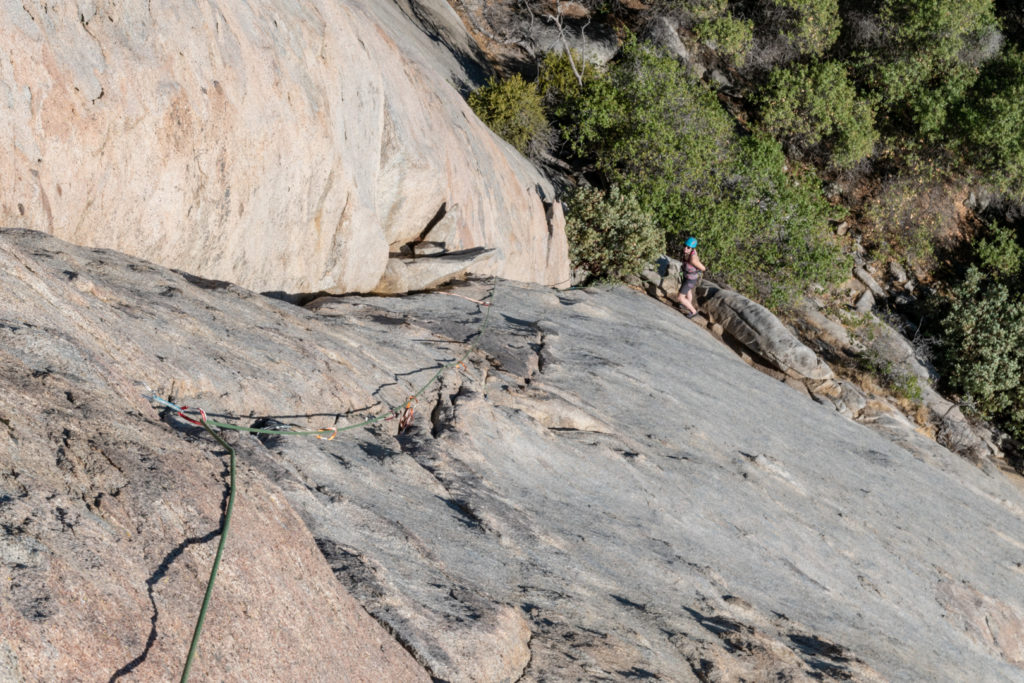
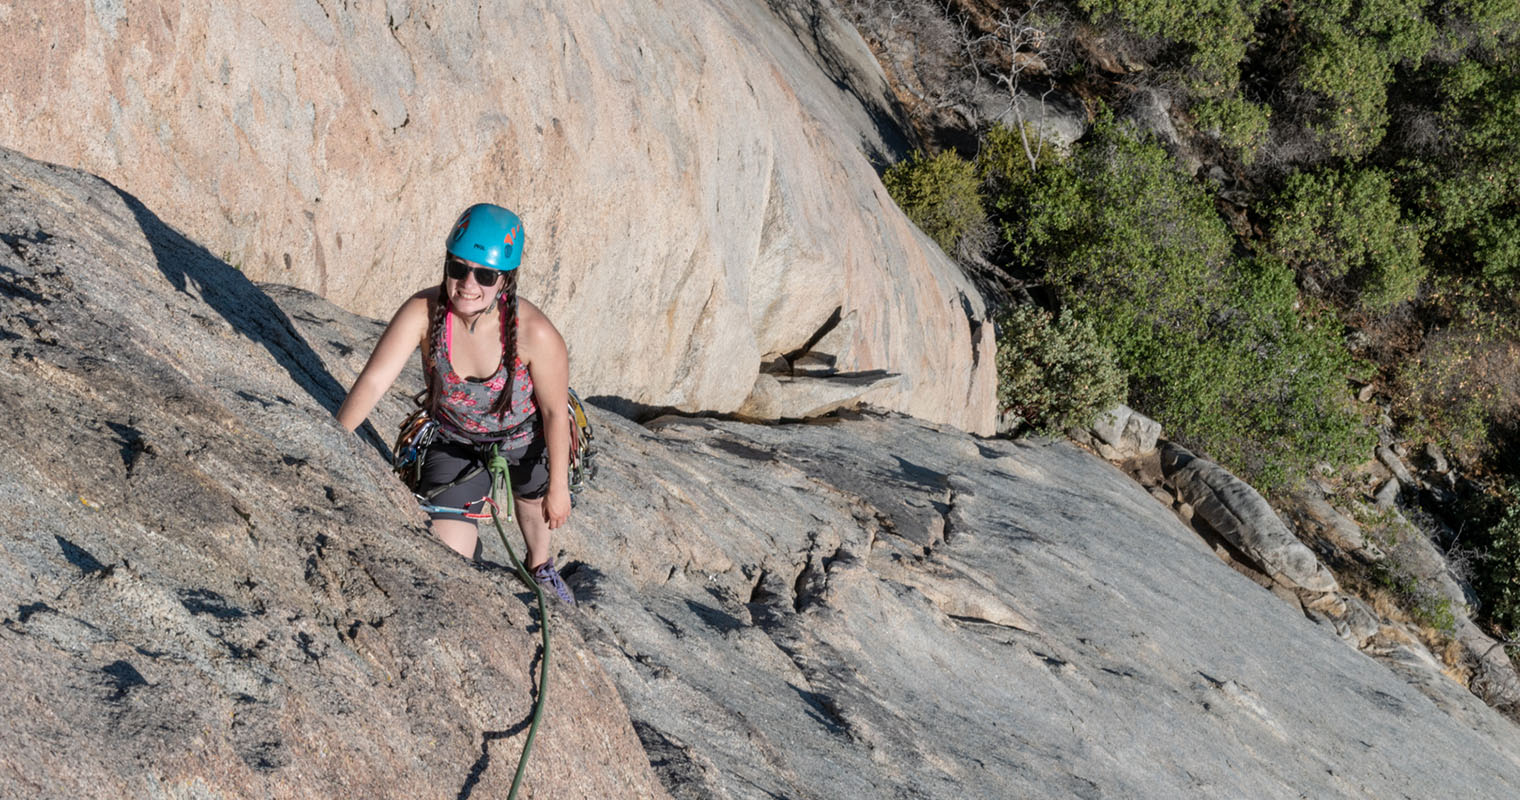
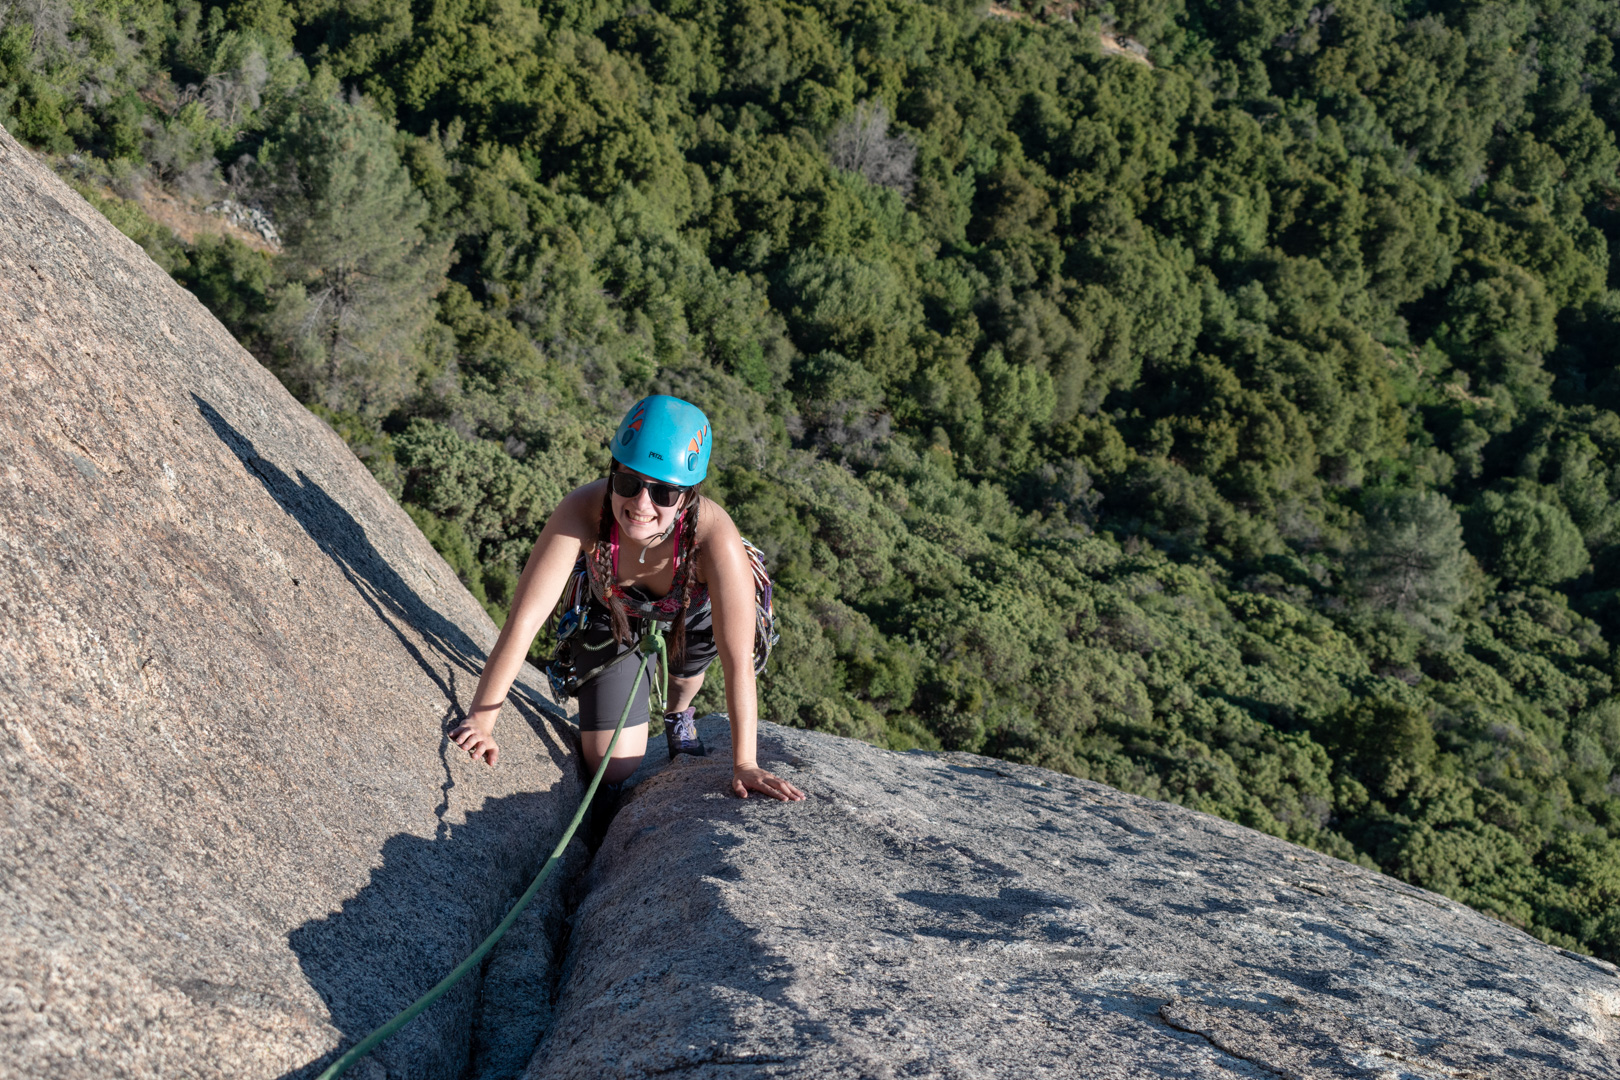
Alexa starting pitch 1 of Tollhouse Traverse 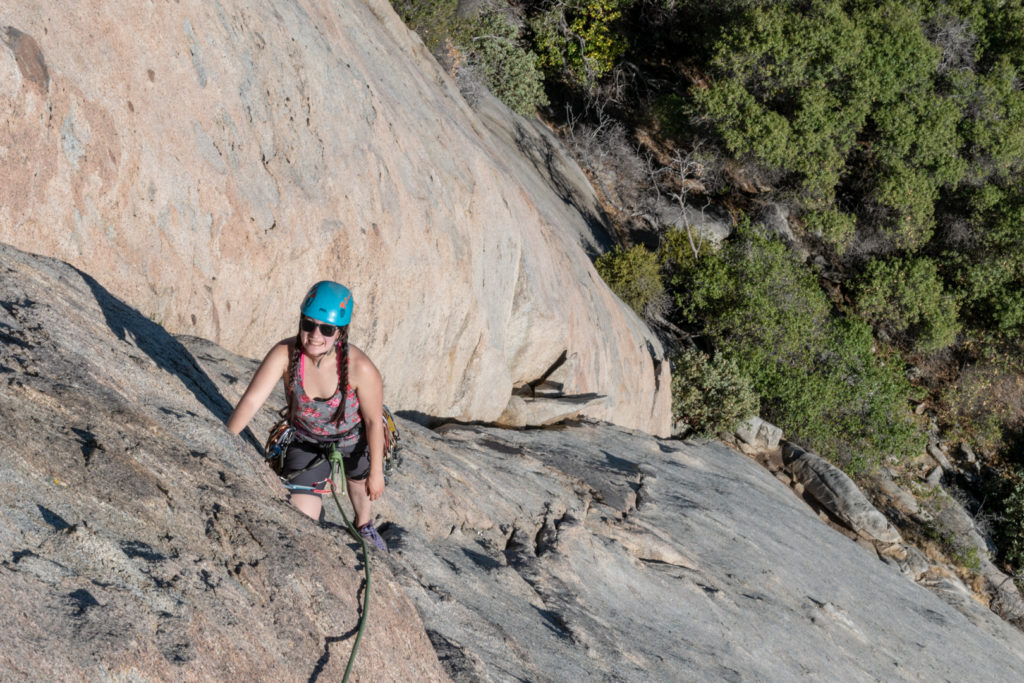
Alexa on pitch 1 of Tollhouse Traverse


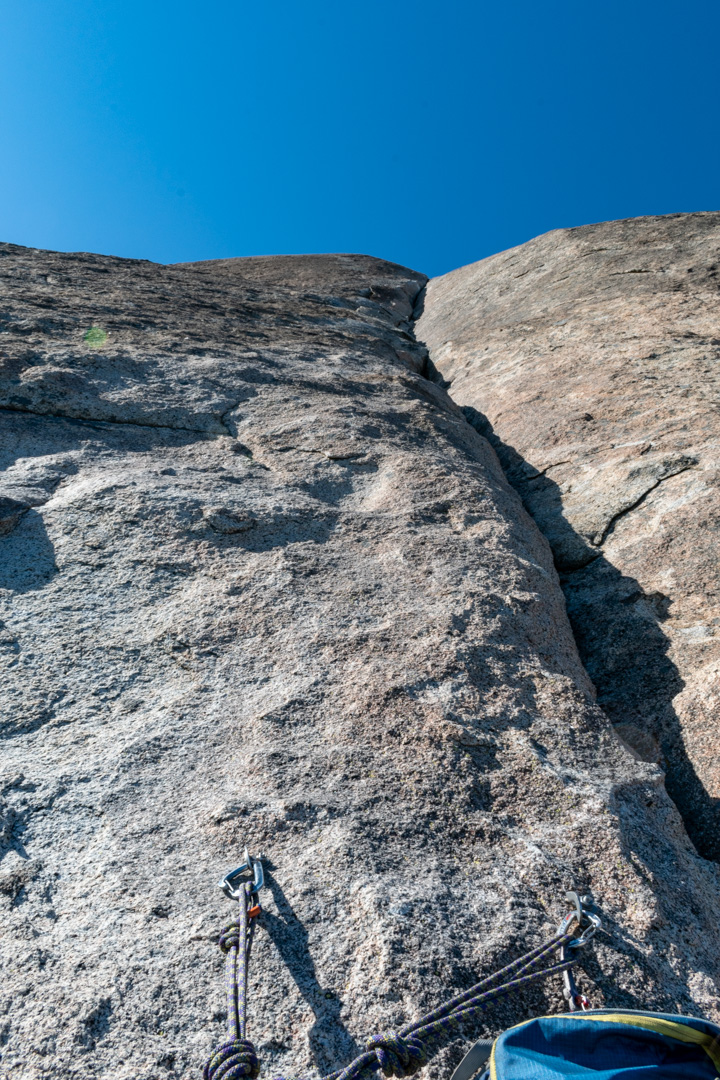
The second pitch headed straight up the crack for long ways. It was mostly hand sized and larger, but with smaller spots appearing on occasion. If you’re a beginner leader, I would recommend having doubles in hand/fist sizes (Black Diamaond #1, 2, & 3s) for this pitch. I only had one of each, but the crack felt pretty secure and I was able to find smaller gear here and there. The anchor was right of the crack with a nice spot to sit and belay adjacent.
Pitch 3 apparently has a few options. The mantle, the dihedral, and the 5.7R slab. We opted to do the mantle, since it didn’t look that hard and seemed the most fun. I believe the dihedral is supposed to be the original route that goes at 5.5 but I haven’t climbed it.
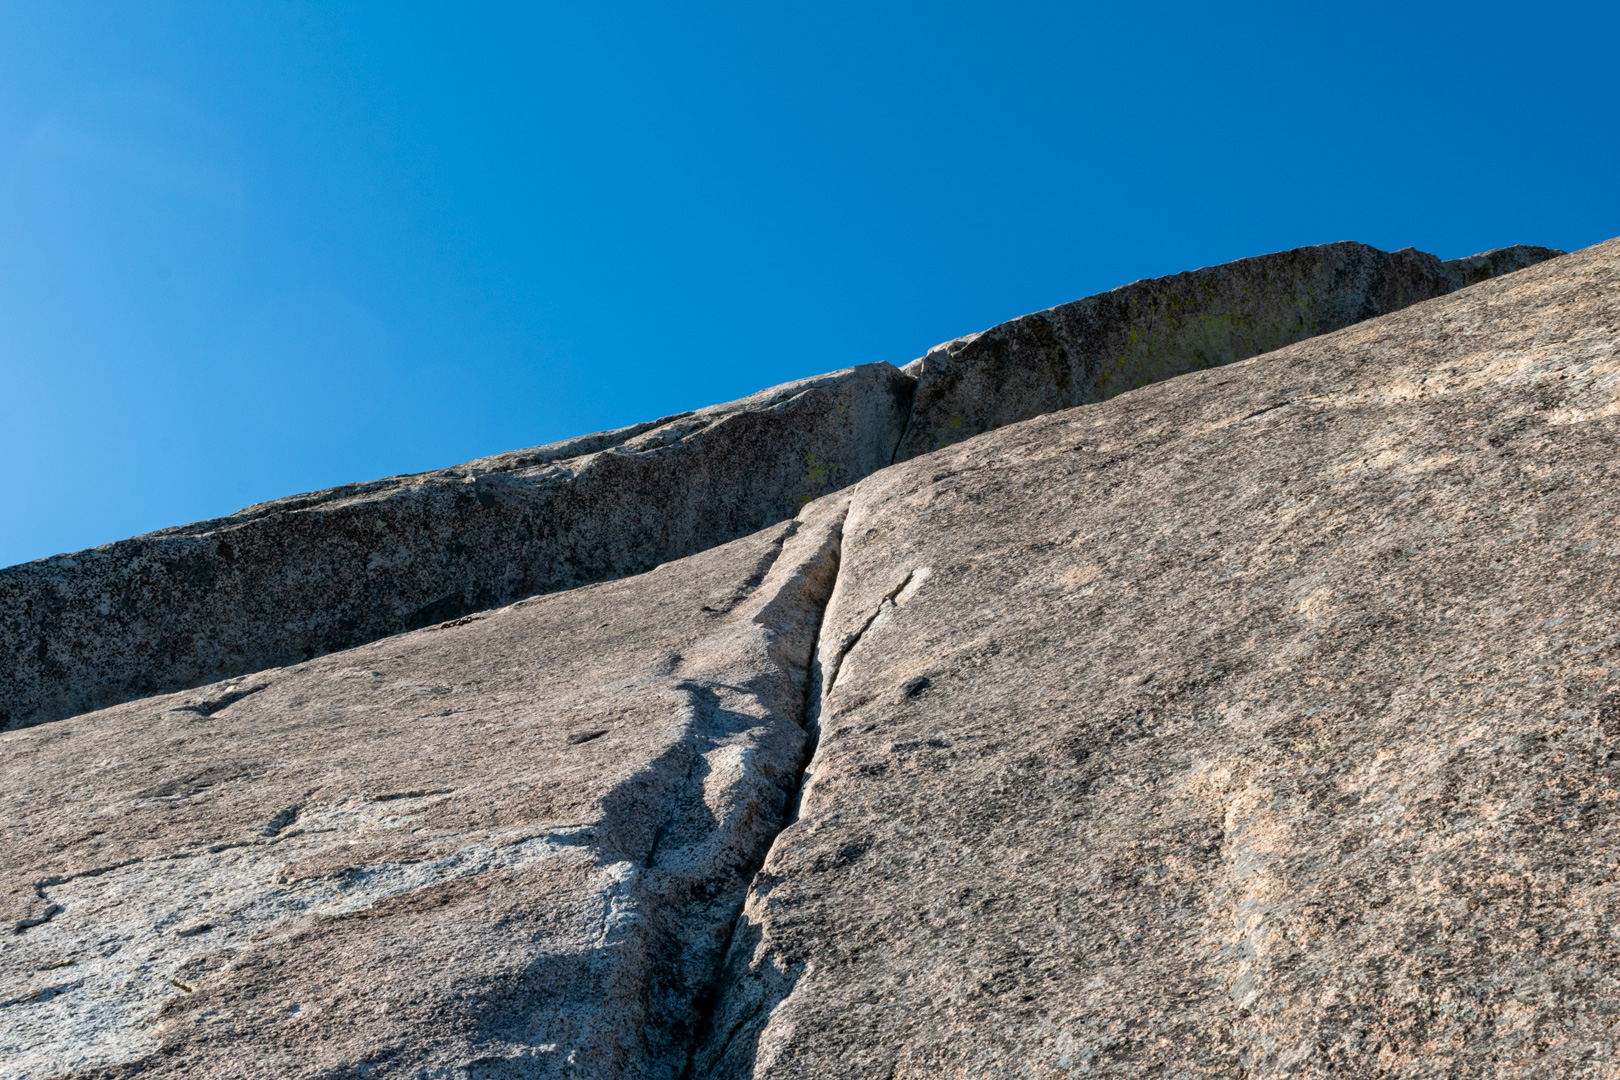
The pictures I have seen of the mantle have always been misleading, which I didn’t realize it until I was there looking at it. I thought the cameras in these pictures were looking upwards, making the mantle look like a roof. In reality, the camera is pointing mostly across the rock to the left. The crack leading to the mantle is a traverse and the mantle is climbing a vertical step to get to the slab on top of the dihedral. It was fun to see it in real life, and a bit of a relief since it looked intimidating in the pictures but not as much in real life.
The traverse to the mantle was easy and took occasional good small cams and nuts. Make sure you place gear on this traverse for your partner or they will be looking at a big pendulum fall across the slab. The mantle has a nice crack with with lots of options for gear. I was able to place gear so I basically climbed the mantle on top rope while leading it. After the mantle, I traversed farther until I reached a nice crack that arched back right. Placing a piece high in this arching crack gave Alexa a good top rope for everything after the mantle.

Misleading picture of the pitch 3 mantle 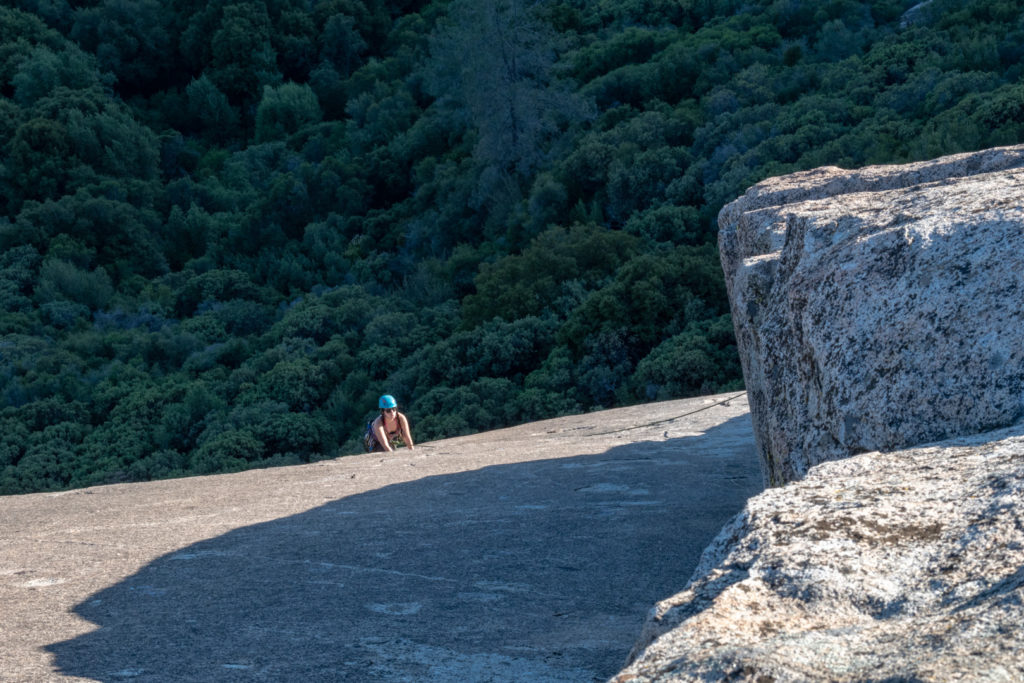
Alexa traversing to the mantle on pitch 3 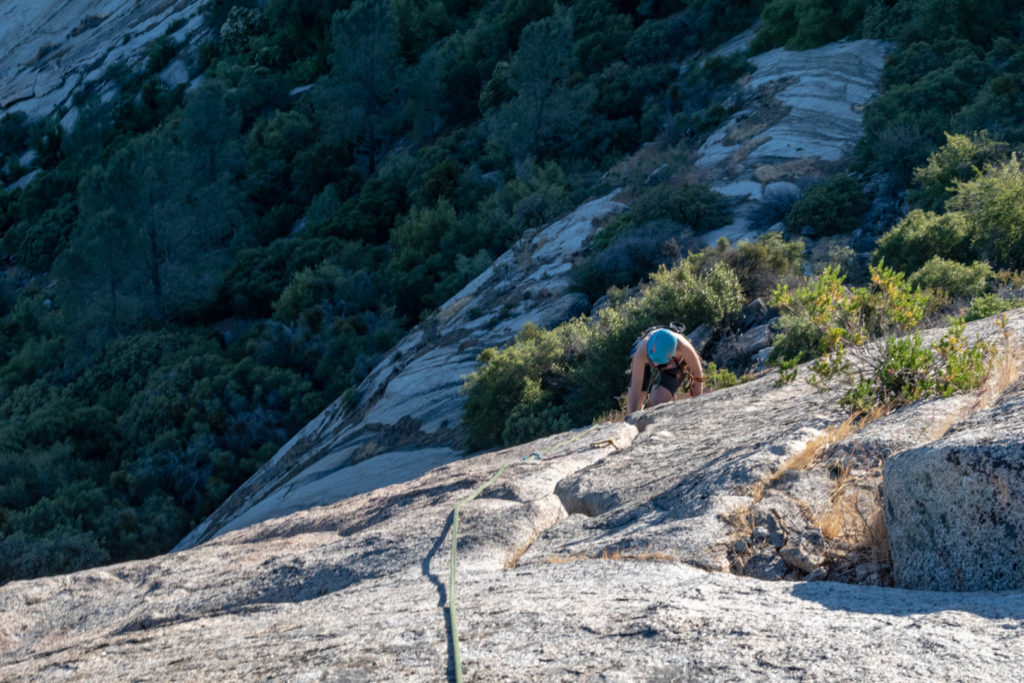
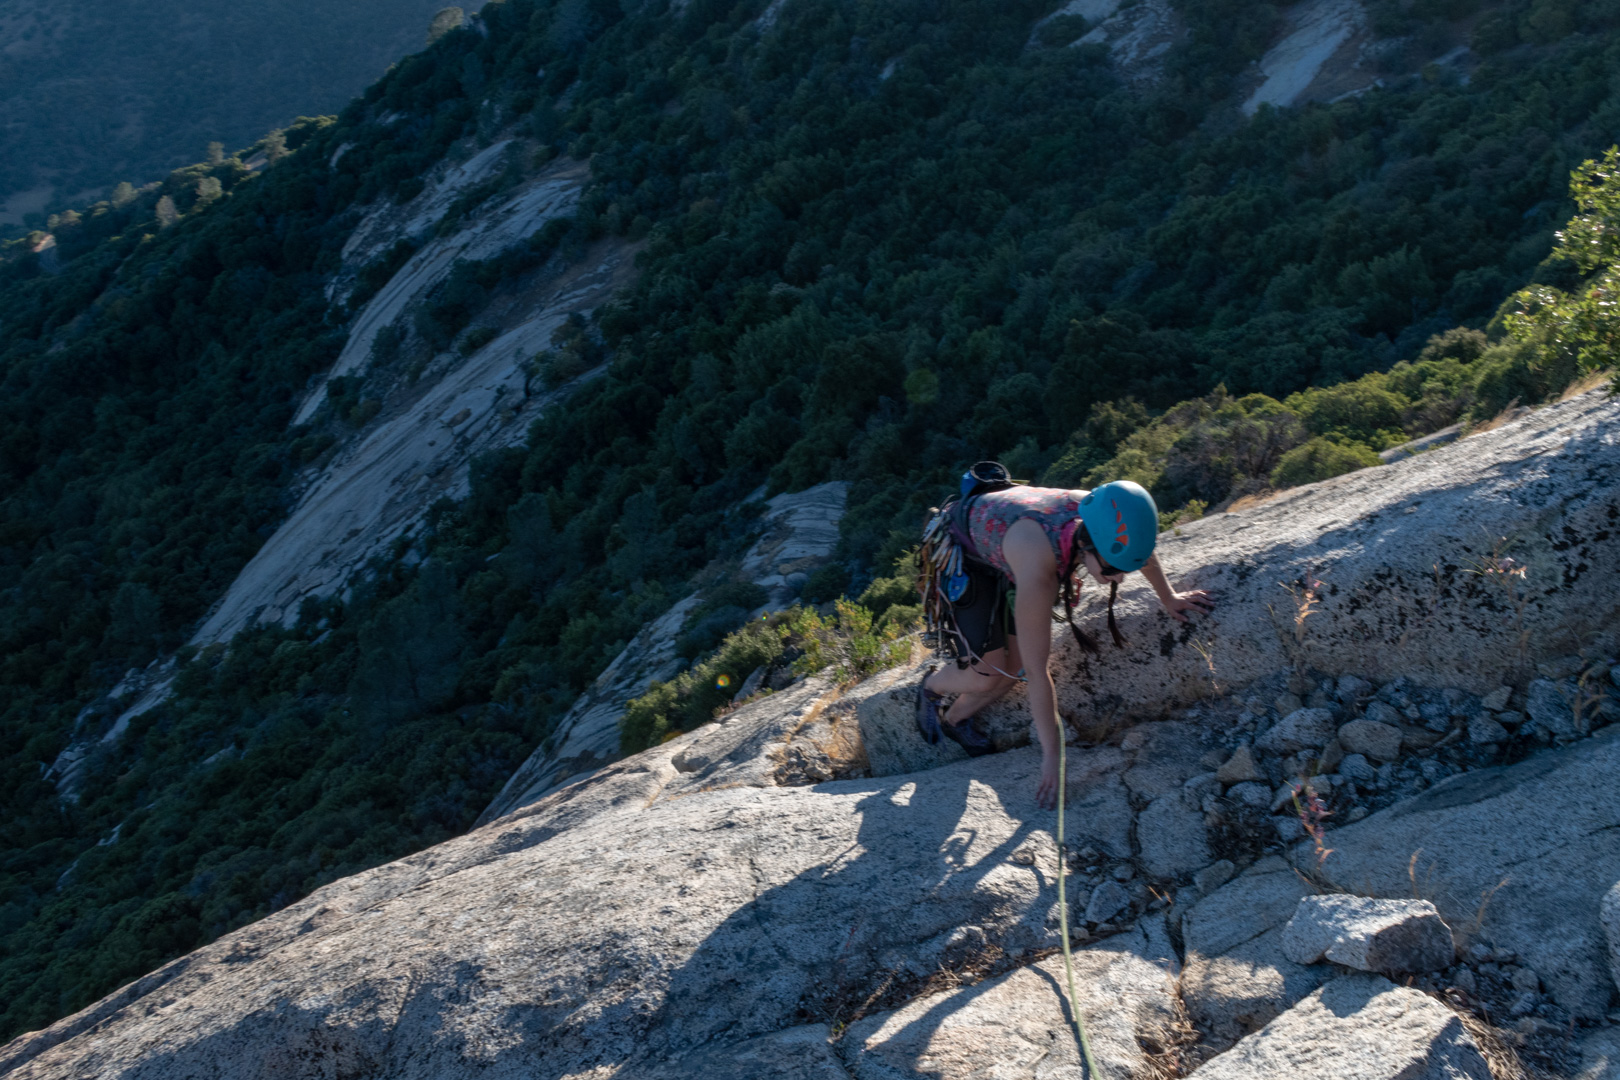
Alexa climbing pitch 3 after the mantle 
Alexa finishing up pitch 3 of Tollhouse Traverse


Pitch 4 was third class scrambling to the top of the formation. Alexa and I chose to unrope for it. We hiked the short but calf-burning remainder of the route to the top, took a couple pictures, and started the hike down. It had only taken us a couple hours to climb the route.
We hiked along the top of Tollhouse until a trail lead us away from the cliff and to a dirt road. The dirt road brought us downhill back to the open granite slab from earlier, where we reversed the hike in and made it back to the car.
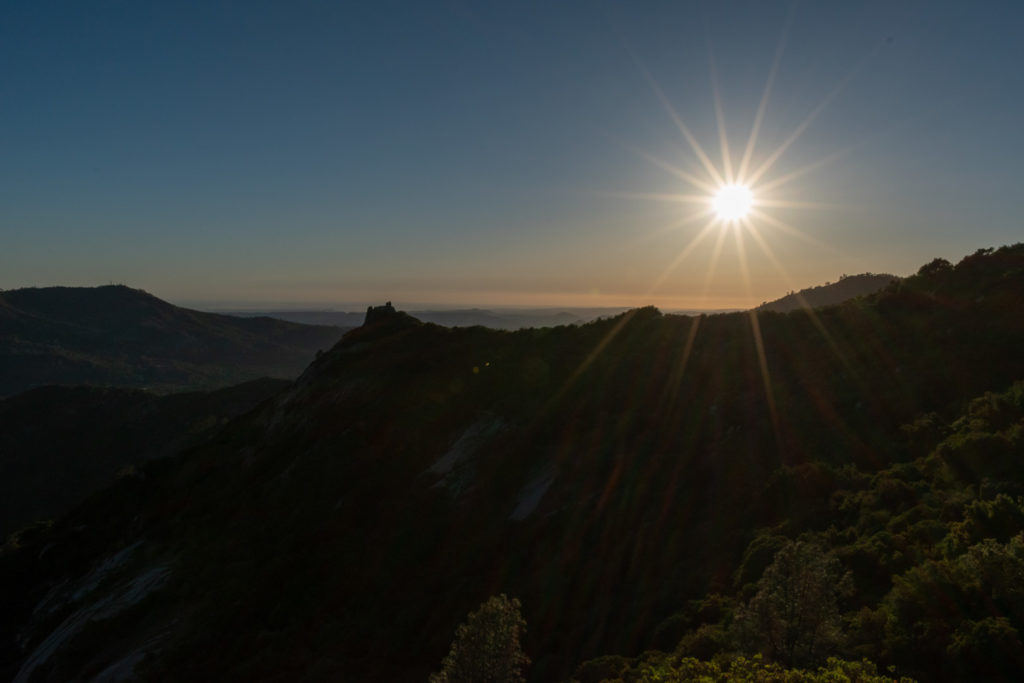
Sun setting over the foothills west of Tollhouse Rock 
Alexa finishing up the hike to the top 
Alexa at the summit of Tollhouse Rock